
Bitbucket is a Git-based source code repository, which offers both commercial plans and free accounts. They provide Access control to restrict access to your source code. The main difference between Git & Bitbucket is, Bitbucket is a web-based version control while Git is distributed version control. And the steps for creating repositories and uploading files are to be followed.
Step 1: Create new Repository :

- Navigate to “ https://bitbucket.org ”, after signing select the ‘ Create ‘ button and Select the ‘ Repository ‘ option.
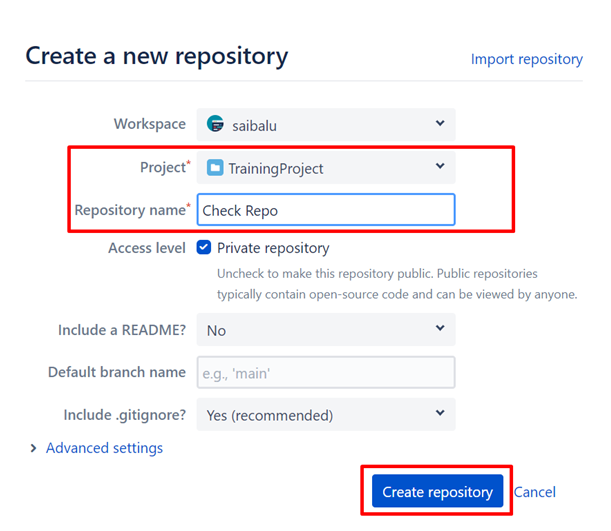
- By providing the adequate, “Project name” & “Repository Name “
Click on “Create Repository” Button. - Then your repository will be created.
Step 2 : Add SSH key
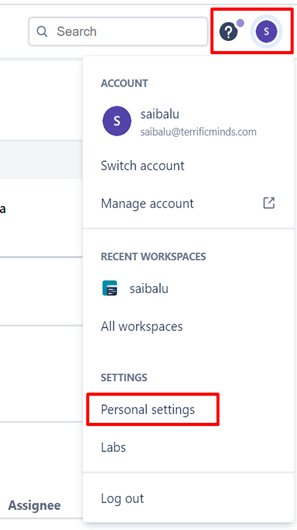
- Select the Account icon – > Select the “Personal Settings” tab
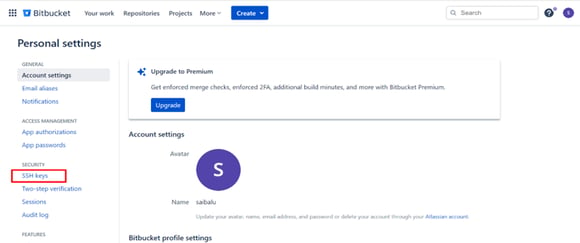
- Click on “SSH key” icon

- Select the “Add key” icon and give the public key.
- To get the public key go to git bash and enter $ cat ~/.ssh/id_rsa.pub in Linux and windows and for macOS $ pbcopy < ~/.ssh/id_rsa.pub
- A public key will be generated in git bash cmd prompt, copy that key completely and paste it over the ‘Key’ field under ‘Add SSH KEY’ window.
- After pasting the SSH key, click on the ‘Add key’ button.
- If the SSH key is not generated please refer https://support.atlassian.com/bitbucket-cloud/docs/set-up-an-ssh-key/
Step 3 : Clone the repo to Root folder
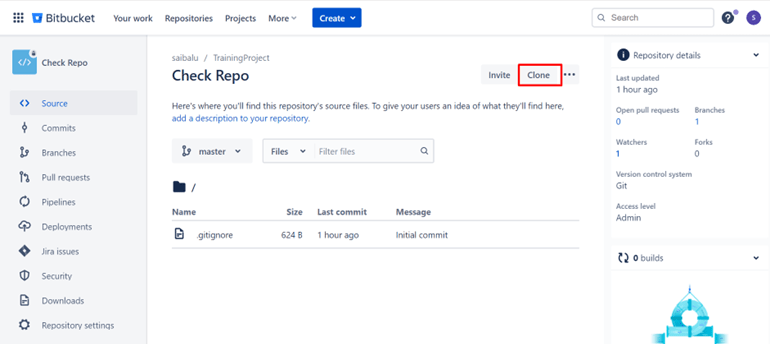
- Select the ‘Clone’ Button.
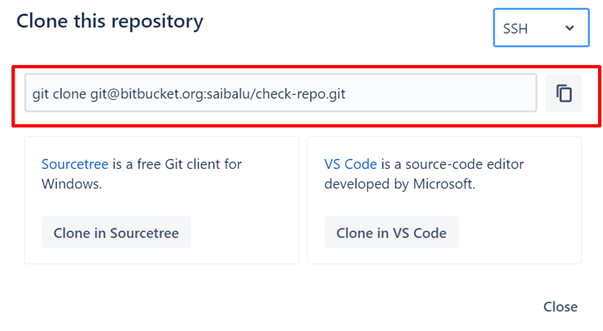
- Copy the SSH link, Go to the root folder and clone the repo using Git bash.

- If you setup the steps correctly, you will be able to find the “.gitignore” folder in the corresponding root folder.
Step 4 : Pushing the files into Repository
There are 2 ways to push the files in Repository
Via Git Bash cmd prompt
- Copy the files needed to be pushed to the root folder.
- Open the git bash window, and enter ‘ git add . ‘ then all your files will be added.
- Enter ‘ git commit -m "message" ‘ then files will be committed with the message.
- Enter ‘ git push‘ and then the files will be pushed to the repository.
Via Git GUI
- Copy the files needed to be pushed to the root folder.
- Open the Git GUI
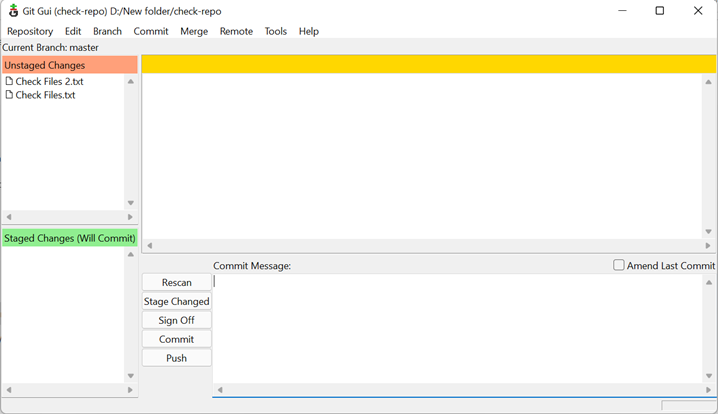
- Then the files you need to be pushed will be under ‘ Unstaged Changes ’, and if you click on the left-top side of each file, these will be moved to the under ‘Staged Changes’, as shown below.
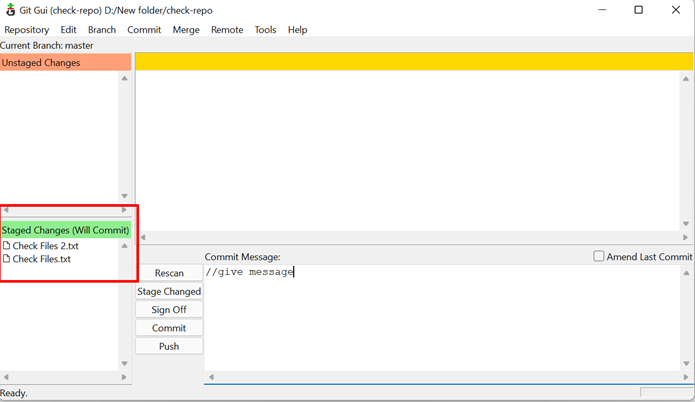
- As you can see, the files from the ‘Unstaged Changes’ are now under the ‘Staged Changes’, after giving the Commit message and the field, click on the ‘Commit’ button.
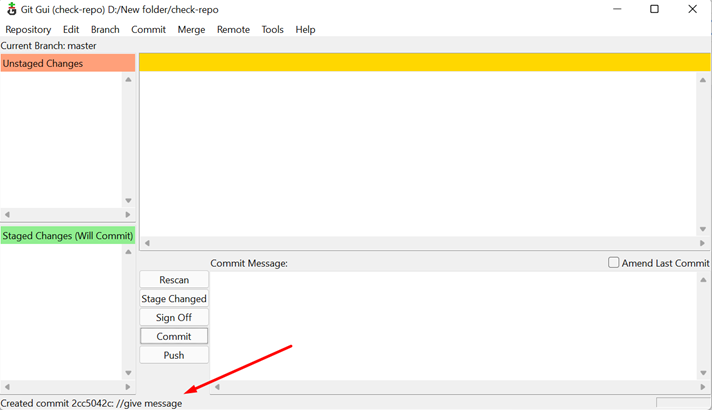
- After selecting the ‘Commit’ button, the files will be committed and the notification will be displayed at the bottom of the window.
- After this step select the ‘ Push ‘ button.
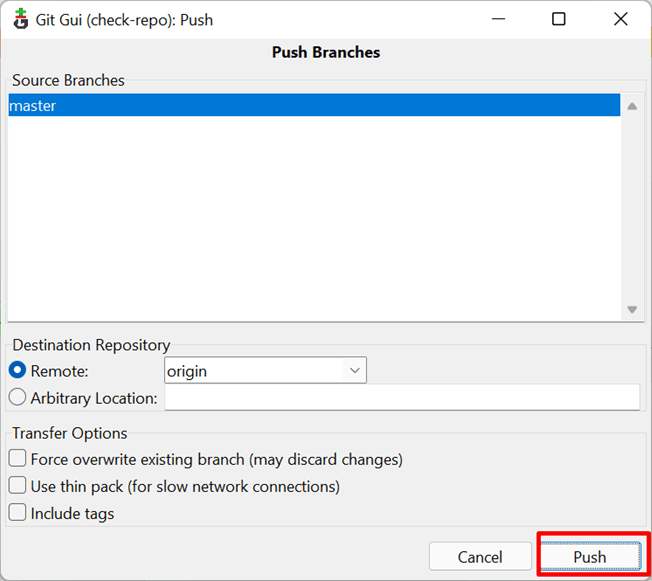
- Select the master branch, and select the ‘ Push ’ button.
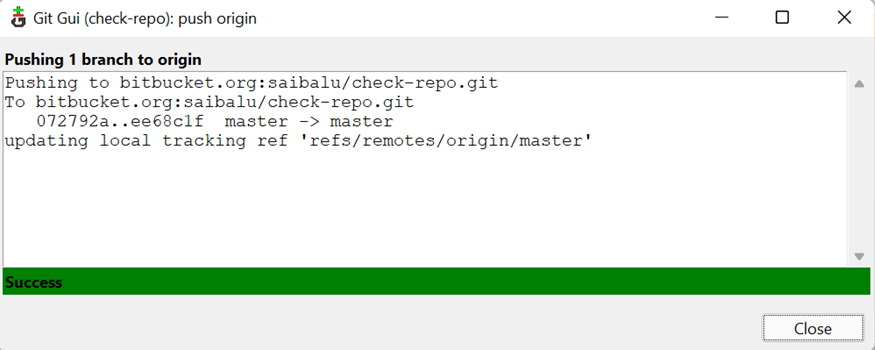
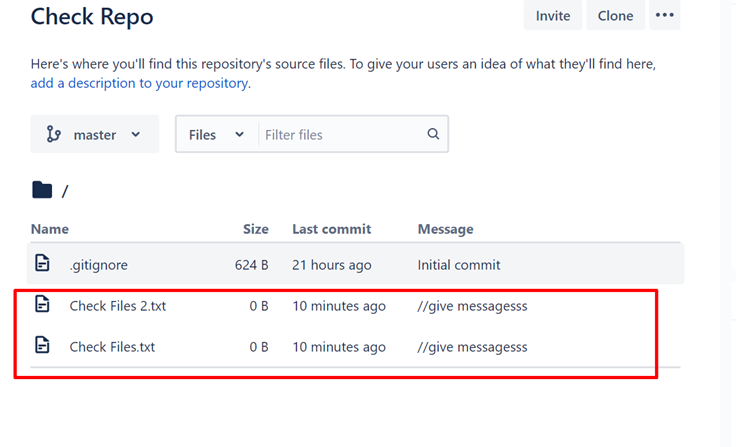
- Then you will see the success dialogue box, and the files will be pushed to your corresponding repository as shown below.
Conclusion
Bitbucket’s unique customizations and integrations make it easy for your team to deliver quality software. By following the steps mentioned in the article, you can easily create repositories within Bitbucket and utilize them to store and maintain files for your organization.


.png?width=352&name=image.png%20(9).png)